Voicemail
Each user has a voicemail box by default, but if you want to create additional voicemail boxes for sales, support, billing or something else – this can be easily done.
The recording from the caller can be delivered as an audio file to an email address of choice.
In this article we will explain how you can set up a Voicemail box in a matter of minutes.

To get started, ensure that you have a free Sonetel account. If you have one, go to the Voice app section in the account settings.
The functions of a Voicemail box
A voicemail box has the following features:
- Plays a welcome message
Plays a message prior to the recording “Welcome to XYZ. Please leave your message after the beep”. - Records the caller
The recording continues until the caller hangs up. - Plays a goodbye message
If the recording exceeds that allowed max time (5 minutes), or turns silent without hanging up – then a goodbye message will be played. - Delivers the recorded message
Sends the message to the destination of choice.

Creating a voicemail box
To create a Voicemail box now, sign into the Sonetel web app and move to the Voice apps section. If you do not have a Sonetel account, create one free here.
This is what the Voice apps section looks like in the Account settings.
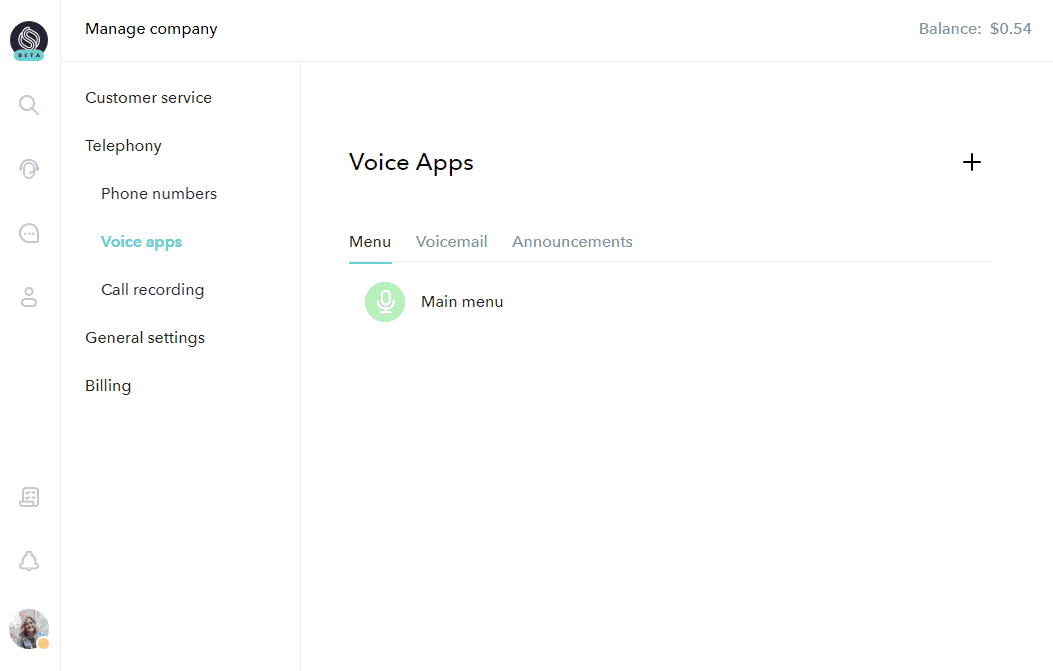
You can create as many new voicemail boxes as you wish by clicking on the “+” icon in the upper right corner of the screen.
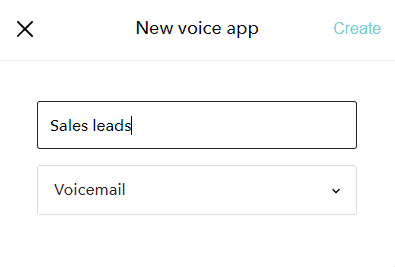
Click on “Create”. This will provide you with an edit view for a new voicemail box.
Voicemail box edit view
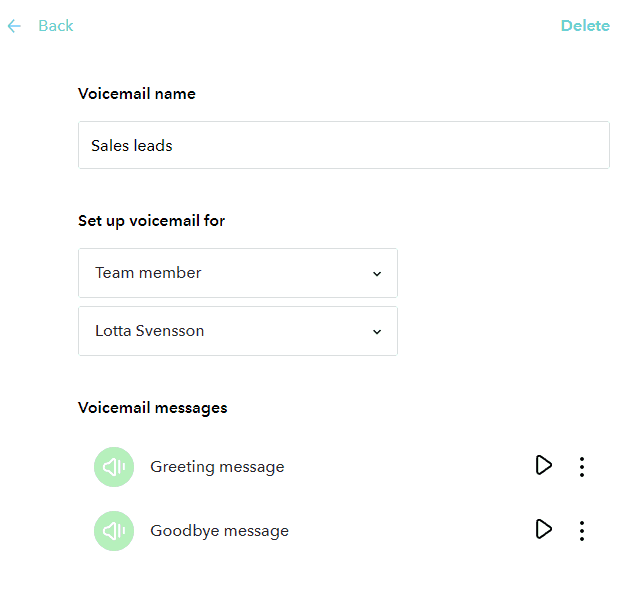
Here are the options:
- Delete
Allows you to delete the entire voicemail box. - Voicemail name
Shows the name you gave the announcement while creating it. - Set up voicemail for
Define the delivery destination for the voicemail. See options below. - Voicemail messages
Allows you to listen to the current greeting and goodbye message.
Optional destinations for delivery
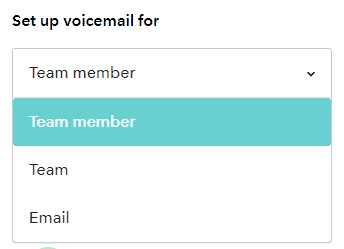
Here are the possible actions that you can take when the caller selects a menu option.
- Team member
The voicemail is delivered by email to the team member selected. - Team
Delivers the voicemail to the customer service team selected. The delivery is done by email to each of the team members. - Email
Enter an email address to which the recording should be delivered.
Update messages played
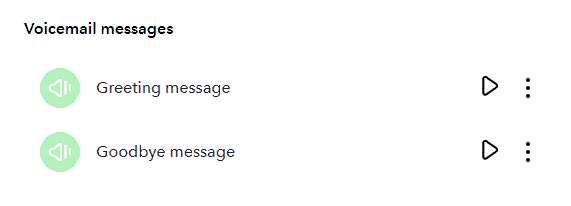
There are two messages played:
- Greeting message
This is played prior to recording the callers message “Please leave a message after the tone”. - Goodbye message
Played if the caller is silent for a while. “Thank you for your message and goodbye”
Push the Play button to listen to what the message sounds like now.
Push the menu icon (next to the play button) and select Replace audio, if you want to change the recording.
If you choose to update a message, you have the following options:
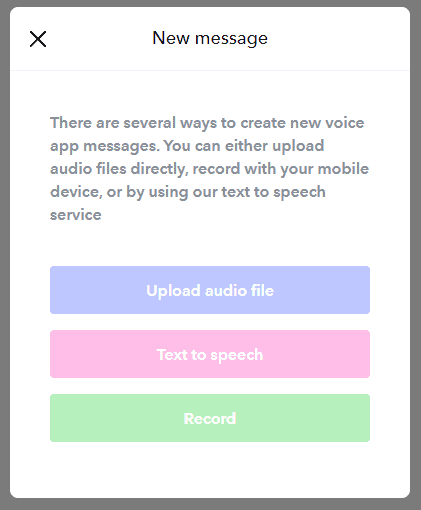
- Upload audio file
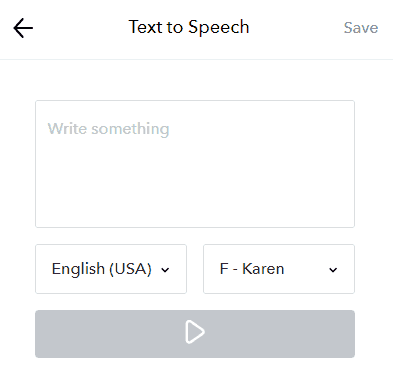
The file you upload should either be in the WAV or MP3 format. - Text to speech
Allows you to type a text and have it converted to a recording in the language of choice, using Text-to-speech.
- Record
We will call your registered mobile number. Follow the instructions on the call to record the new message.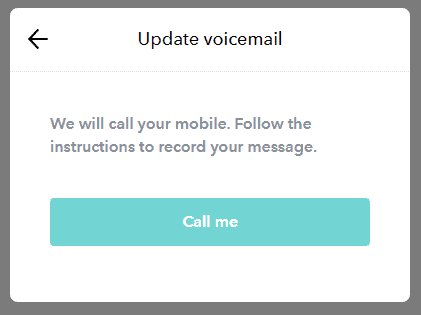
Connect your voicemail box to the world
You can purchase phone numbers from Sonetel and connect these to your voicemail. If you already have a Sonetel account, go to the phone numbers page. Otherwise, sign up and select a number here.
You can send incoming calls from any service provider of choice that supports SIP, to Voice apps (Cloud IVR). It is also possible to send calls from your SIP equipment to the unique SIP address of the Cloud IVR voicemail.
Not receiving any voicemail?
If you are not receiving voicemails as expected, this may be caused by either of these reasons:
- No paid plan
You need to have a paid plan that includes support for Voice apps to get Voicemail.
- Deliveries ended up in your email spam inbox
Our delivery may have ended up in your spam email inbox. Add testsonetelcom.kinsta.cloud to your safe senders list in your email program to be sure to receive voicemail.
Photo by Philipp Lansing and Adrien Olichon on Unsplash